How to install insulated siding? This seemingly straightforward question opens a door to a world of considerations, from selecting the right materials for your climate to mastering the intricacies of installation. Understanding the nuances of each step—from meticulous preparation and planning to the precise execution of the installation process—is crucial for a successful and long-lasting outcome. This guide delves into the practical aspects of installing insulated siding, equipping you with the knowledge and confidence to tackle this home improvement project.
We’ll explore various insulated siding materials, their respective pros and cons, and help you choose the best option for your needs. Detailed, step-by-step instructions will guide you through the entire process, covering everything from initial measurements and wall preparation to the finishing touches and ongoing maintenance. We’ll also address common challenges and provide practical solutions to ensure a smooth and efficient installation.
Dealing with Specific Challenges
Insulated siding installation, while straightforward in principle, presents several challenges that require careful planning and execution. Understanding these potential problems and having solutions readily available is crucial for a successful and aesthetically pleasing outcome. This section will address common difficulties, offering practical advice to overcome them.
Corner and Angle Installation
Properly installing insulated siding around corners and angles requires meticulous attention to detail. Pre-cut corner pieces are available for many siding types, simplifying the process. However, these may not always perfectly match the angles of your home, necessitating some on-site adjustments. For sharp corners, use a miter saw to create precise cuts that ensure a tight, weatherproof fit. For less defined angles, carefully measure and mark the siding, making small, incremental cuts until a perfect fit is achieved. Always ensure proper overlapping and sealing to prevent water penetration. Using caulk specifically designed for exterior use is vital in sealing gaps and ensuring a watertight seal around corners and angles.
Handling Different Siding Materials
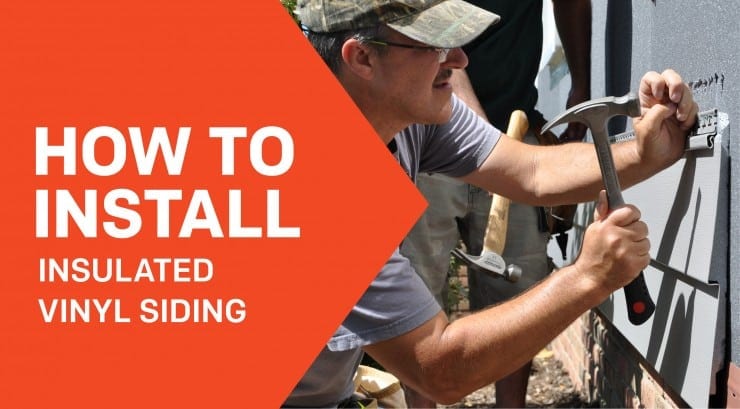
Different insulated siding materials present unique installation challenges. Vinyl siding, for example, is relatively easy to work with but can be prone to warping in extreme temperatures. Careful handling and avoiding excessive force during installation are crucial. Fiber cement siding is more durable but requires specialized tools and more precise cutting. Always consult the manufacturer’s instructions for specific handling and installation recommendations. For example, fiber cement boards may require pre-drilling before fastening to prevent cracking. Metal siding is durable and requires proper grounding to prevent electrical issues.
Troubleshooting Common Problems
Several issues can arise during insulated siding installation. Improperly cut pieces can lead to gaps and water leakage. Using the wrong fasteners can result in damaged siding or poor fastening. Inconsistent spacing between siding panels can create an uneven and unprofessional appearance. These problems can often be rectified by carefully removing the affected section, making the necessary corrections, and reinstalling the siding. Always ensure that the underlying structure is sound and properly prepared before installing siding. Using a level throughout the process is essential for ensuring a straight and even installation.
| Problem | Cause | Solution |
|---|---|---|
| Gaps between siding panels | Improper measurement or cutting; inconsistent spacing | Remove and replace affected panels; ensure consistent spacing using spacers |
| Warped siding | Exposure to extreme temperatures; improper handling | Use caution during installation; avoid excessive force; ensure proper acclimation to local climate |
| Cracked siding (fiber cement) | Improper fastening; lack of pre-drilling | Pre-drill holes before fastening; use appropriate fasteners |
| Water leakage | Improper sealing; gaps around corners or windows | Apply appropriate caulk; ensure proper overlap and sealing of all joints |
Finishing Touches and Maintenance
Proper finishing touches and consistent maintenance are crucial for ensuring the longevity and effectiveness of your insulated siding installation. Neglecting these steps can lead to premature wear, water damage, and a less aesthetically pleasing exterior. This section details the essential procedures for completing your installation and maintaining its integrity over time.
Sealing and Caulking for Watertight Installation
Effective sealing and caulking are paramount in preventing water intrusion, a major cause of siding damage. All seams, joints, and gaps around windows and doors should be meticulously sealed with a high-quality, weather-resistant caulk. Choose a caulk specifically designed for exterior use and compatible with your siding material. Apply the caulk in a smooth, continuous bead, ensuring complete coverage of the gap. Tool the caulk smoothly with a wet finger or caulking tool for a neat, professional finish. Pay particular attention to areas prone to expansion and contraction, such as corners and around penetrations. Regular inspection of caulking is advised, and reapplication should be undertaken as needed to prevent leaks. For example, areas exposed to direct sunlight may require more frequent caulking maintenance than shaded areas.
Cleaning and Maintaining Insulated Siding
Regular cleaning helps maintain the appearance and extends the life of your insulated siding. For most types of insulated siding, a simple cleaning with a garden hose and a soft-bristled brush is sufficient. For stubborn dirt or grime, a mild detergent solution can be used. Avoid harsh chemicals or abrasive cleaners, as these can damage the siding’s finish. Power washing should be done with caution, using a low-pressure setting to avoid damaging the siding. Direct the spray nozzle at a slight angle to prevent water from seeping behind the siding. Annual cleaning, ideally in the spring or fall, is recommended to remove accumulated dirt, pollen, and other debris. Addressing issues promptly will help prevent larger problems. For example, if you notice mold or mildew growth, address it immediately with a suitable cleaning solution before it spreads.
Identifying and Addressing Potential Damage or Wear
Regular inspection of your insulated siding is essential for early detection of any damage or wear. Look for signs of cracking, warping, dents, or loose panels. Small cracks can often be repaired with caulk or patching compounds. Loose panels should be re-secured immediately to prevent further damage. Significant damage may require professional repair or replacement of affected sections. Regular checks for signs of insect infestation or water damage should also be carried out. For example, regularly checking around windows and doors for signs of water stains or wood rot is crucial for preventative maintenance. Promptly addressing these issues prevents larger, more costly repairs later.
Painting or Staining Insulated Siding
Painting or staining insulated siding can enhance its appearance and provide additional protection from the elements. Always choose paints or stains specifically designed for exterior use and compatible with your siding material. Proper surface preparation is crucial for a successful paint or stain job. Clean the siding thoroughly, repair any damage, and apply a primer if necessary. Follow the manufacturer’s instructions carefully when applying the paint or stain, using appropriate tools and techniques. Multiple thin coats are generally preferable to one thick coat to ensure even coverage and prevent drips or runs. For example, using a high-quality exterior paint designed for siding will ensure a longer-lasting, more weather-resistant finish than using a cheaper, interior-grade paint.
Safety Precautions
Installing insulated siding involves working at heights and handling sharp tools, necessitating a strong emphasis on safety. Failing to prioritize safety can lead to serious injury or even fatalities. This section outlines essential safety measures to minimize risks throughout the installation process.
Proper safety equipment is paramount to prevent accidents. Ignoring these precautions could result in severe injuries, impacting both your health and the project’s timeline.
Personal Protective Equipment (PPE)
Appropriate personal protective equipment (PPE) is crucial for protecting yourself from potential hazards during siding installation. This includes, but isn’t limited to, safety glasses or goggles to protect your eyes from flying debris, sturdy work gloves to safeguard your hands from cuts and splinters, and hearing protection to mitigate the noise from power tools. A hard hat is also recommended, especially when working at heights. Furthermore, appropriate footwear with good grip is essential to prevent slips and falls, especially on ladders or uneven surfaces. Choosing the right PPE ensures a safer and more efficient installation process.
Working at Heights
Working at heights presents significant risks, including falls. Always use a stable and properly secured ladder that extends at least three feet above the roofline. Inspect the ladder before each use, ensuring it is free from damage and properly positioned on a level surface. Never overreach while on a ladder; instead, move the ladder to maintain a safe working position. Consider using a safety harness and lanyard for added protection when working at significant heights, especially if there’s a risk of falling. A spotter on the ground can also provide an extra layer of safety.
Potential Hazards and Mitigation Strategies
Several hazards exist during insulated siding installation. Sharp edges of siding panels can cause cuts, necessitating careful handling and the use of gloves. Power tools, such as circular saws and nail guns, pose risks of injury if not used correctly, emphasizing the importance of following manufacturer instructions and utilizing appropriate safety guards. Working near electrical wires necessitates extreme caution and, if necessary, consultation with a qualified electrician to ensure safety.
- Always inspect tools before use to ensure they are in good working order and free from damage.
- Use caution when handling sharp objects like knives and utility blades.
- Wear appropriate safety glasses or goggles to protect your eyes from flying debris.
- Wear hearing protection when operating power tools.
- Use a stable and properly secured ladder when working at heights.
- Never overreach while on a ladder.
- Use caution when working near electrical wires.
- Ensure proper ventilation when working with adhesives or sealants.
- Keep the work area clean and free of debris.
- Follow all manufacturer instructions for tools and materials.
Conclusive Thoughts
Successfully installing insulated siding involves a blend of careful planning, precise execution, and attention to detail. From selecting the appropriate materials and preparing the surface to mastering the installation techniques and implementing proper safety measures, each step contributes to a final product that enhances your home’s curb appeal, energy efficiency, and longevity. By following this guide and understanding the potential challenges, you can confidently embark on this rewarding home improvement project, transforming your home’s exterior while improving its energy performance.